# Data Providers Quick Start
# Creating a DebiAI Data Provider
There are multiple ways to create a DebiAI Data Provider:

Python module
Create a Data Provider from a single Python file

Service templates
Generate a Data Provider using a pre-built template

Custom implementation
Build a Data Provider from scratch
# DebiAI Data Provider Python Module (Recommended)
The simplest way to create a Data Provider is by using the DebiAI Data Provider Python module (opens new window). This module allows you to define access methods and event handlers within a single Python class.
# Data Provider Templates
To streamline Data Provider creation, we offer quick-start templates. Currently, templates are available for:
- Node.js: GitHub Repository (opens new window)
Want support for another language? Let us know (opens new window).
# Custom Data Provider Implementation
You can build your own Data Provider as long as it follows the DebiAI Data Provider API (opens new window).
# Connecting a Data Provider to DebiAI
After creating your Data Provider, you must configure DebiAI to access it:

With debiai-gui
If using the cli provided by our python module

From the dashboard
Easiest method, but not persistent

Env. variables
Best for Docker deployments
Configuration file
For development setups
# With DebiAI-gui
If you are using the DebiAI-gui Python package to run DebiAI, you can add Data-providers directly as parameters:
debiai-gui start -dp http://localhost:4000 http://localhost:8000
DebiAI will automatically connect to the specified Data Providers.
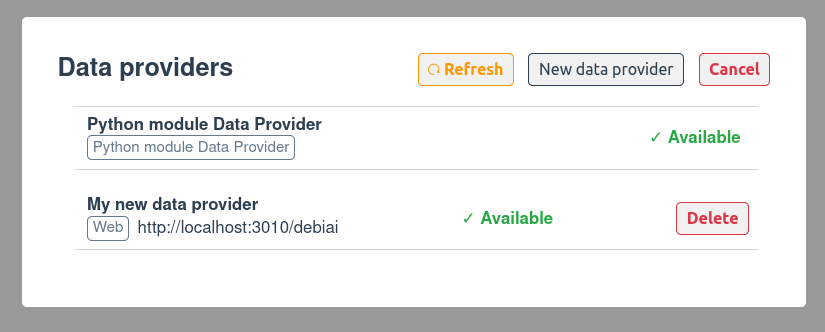
# Connecting via the Dashboard
You can add a Data Provider through the DebiAI dashboard:
- Click Manage Data Providers on the home page.
- Click New Data Provider.
- Fill in the following details:
- Data Provider Name: A unique name for identification.
- Data Provider URL: The endpoint where DebiAI can access the provider.
- Click Save. If the provider is accessible and API-compliant, DebiAI will list the projects in the dashboard.
WARNING
Dashboard-added providers are not persistent. Restarting DebiAI will remove them. Use environment variables or a configuration file for persistence.
# Connecting via Environment Variables
For deployments, you can define environment variables to specify provider URLs.
# Example:
export DEBIAI_WEB_DATA_PROVIDER_MyDataProvider1=http://localhost:3000/debiai
export DEBIAI_WEB_DATA_PROVIDER_MyDataProvider2=http://localhost:3010/
With Docker:
docker run -p 3000:3000 \
    -e DEBIAI_WEB_DATA_PROVIDER_MyDataProvider1=http://localhost:3000/debiai \
    -e DEBIAI_WEB_DATA_PROVIDER_MyDataProvider2=http://localhost:3010/ \
    debiai/app
With Docker Compose:
version: "3.8"
services:
  debiai:
    image: "debiai/app"
    ports:
      - "3000:3000"
    environment:
      - DEBIAI_WEB_DATA_PROVIDER_MyDataProvider1=http://localhost:3000/debiai
      - DEBIAI_WEB_DATA_PROVIDER_MyDataProvider2=http://localhost:3010/
For a full list fo environment variables, check the config.env (opens new window) file.
# Connecting via Configuration File
You can also configure providers in config.ini:
Example (debiai/debiaiServer/config/config.ini):
[DATA_PROVIDERS]
MyDataProvider1 = http://localhost:3000/debiai/
MyDataProvider2 = http://localhost:3010/
After editing, restart DebiAI (or rebuild the Docker image if using containers).
Configuration priority order:
- DebiAI-gui python module parameters
- Environment variables
- Configuration file settings.
If the provider is accessible and follows the API, DebiAI will list the projects in the dashboard.
WARNING
DebiAI must be able to access your Data Provider.
- If running locally, use
localhostas the URL. - If hosted externally, use the public IP address.
- When using Docker, you may need to use the public IP or
--network hostto access a provider deployed onlocalhost.
More details: Docker documentation (opens new window).